Los Angeles roads are rough on your car’s headlights. Between the smog, dust, and relentless sun exposure, it’s no surprise they end up looking foggy, yellowed, or just plain sad. But don’t worry—you don’t have to live with dim, ugly headlights (or spend a fortune replacing them). With a little elbow grease and the right tools, you can restore your headlights to their former crystal-clear glory. Here’s how.
Step 1: Gather Your Supplies
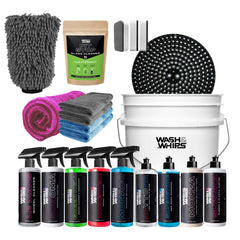
Before you start, make sure you have:
-
Car soap and water
-
Microfiber towels
-
Masking tape
-
Sandpaper (800, 1500, and 3000 grit)
-
Plastic or headlight polish
-
UV-resistant sealant or clear coat
-
A polishing pad or soft cloth
Step 2: Clean the Headlights
Wash your headlights thoroughly with car soap and water to remove dirt, dust, and debris. Dry them with a microfiber towel. This ensures you’re working with a clean surface and not just grinding dirt into the plastic.
Step 3: Tape Around the Headlights
Use masking tape to protect the surrounding paint. Sanding and polishing can easily scuff up your car’s finish, and nobody wants to explain that to a body shop.
Step 4: Wet Sand the Headlights
If your headlights are mildly hazy, you can skip this step and go straight to polishing. But if they look like they belong on a haunted car, sanding is a must.
-
Start with 800-grit sandpaper (wet). Sand in horizontal motions, keeping the surface wet with water.
-
Move to 1500-grit sandpaper, sanding in a different direction (e.g., vertical) to remove previous scratches.
-
Finish with 3000-grit sandpaper for a smooth surface.
Dry the headlights with a microfiber towel before moving to the next step.
Step 5: Polish for Clarity
Apply headlight or plastic polish to a soft cloth or polishing pad. Work it into the surface using circular motions. This step removes fine scratches and restores clarity. Buff the polish off with a clean microfiber towel.
Step 6: Seal and Protect
Los Angeles sunlight is brutal, and without protection, your headlights will haze up again fast. Apply a UV-resistant sealant or clear coat to protect your work. Let it dry completely before exposing the headlights to water.
Step 7: Regular Maintenance
-
Wash your headlights regularly to prevent buildup.
-
Reapply sealant every few months for long-term protection.
-
Avoid harsh chemicals that can degrade the plastic.
Conclusion
Driving through Los Angeles with foggy headlights isn’t just ugly—it’s dangerous. Instead of squinting through the haze or overpaying for replacements, follow this easy DIY method to restore your headlights. Need professional detailing? WASH&WHIPS is here to help—contact us today for expert headlight restoration services!